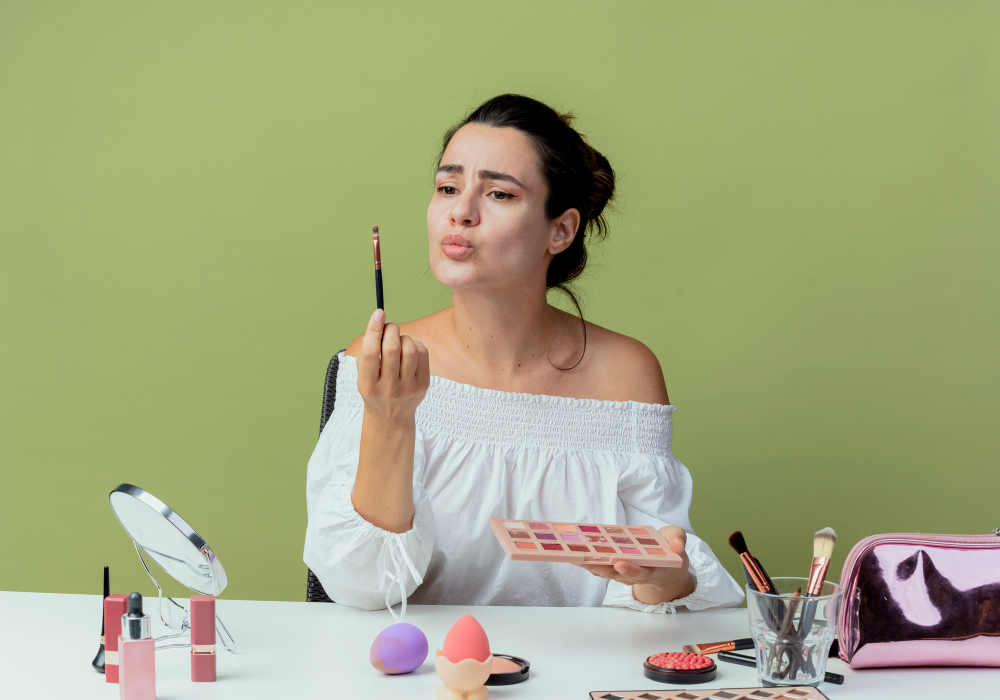
Whether you’re heading to brunch in Los Angeles, a day at work in London, or just want to master your everyday look in the USA, understanding makeup steps one by one makes your beauty routine easier, more effective, and way more fun. This complete guide is written with beginners in mind but detailed enough for anyone looking to refresh their routine.
We’ll break down each step, explain how and why to use each product, and offer local beauty insights from LA’s glowing glam to London’s chic classics.
How to Apply Makeup Step by Step in 2025
Step 1: Start with Clean, Moisturized Skin
Before you apply any makeup, your skin needs to be clean and prepped.
Why it matters:
- Prevents breakouts
- Helps products apply evenly
- Boosts hydration for a natural glow
What to do:
- Wash your face with a gentle cleanser that suits your skin type.
- Apply a toner if needed (great for oily or acne-prone skin).
- Use a moisturizer that hydrates but doesn’t make your skin greasy.
- Apply sunscreen during the day (SPF 30+).
LA Tip: Use gel-based moisturizers for hot weather.
London Tip: In colder months, go for thicker, creamy moisturizers.
Step 2: Apply Primer – The Secret to Smooth Makeup
Primer helps blur pores, smooth fine lines, and keep makeup from slipping.
Types of Primers:
- Mattifying Primer: For oily skin and hot weather
- Hydrating Primer: For dry or mature skin
- Pore-Filling Primer: For textured skin
- Illuminating Primer: For dull skin or dewy looks
Apply a small amount to your T-zone or entire face using your fingers or a brush. Let it sit for a minute.
Step 3: Foundation – Create an Even Base
Foundation evens out skin tone and sets the stage for everything else.
How to choose:
- Match to your jawline, not your hand.
- Choose based on coverage: light (tinted moisturizer), medium, or full.
- Pick the right finish: matte, natural, or dewy.
Application tools
- Brush: For full coverage
- Sponge: For seamless blending
- Fingers: For light coverage
LA Trend: Skin tints and sheer coverage for a natural look.
London Trend: Buildable foundations with semi-matte finishes
Related Post: 15 Best Clothing Online Brands to Shop for Style
Step 4: Concealer – Cover and Brighten
Concealer helps hide dark circles, redness, and blemishes.
Where to apply:
- Under the eyes (inner corner to outer edge)
- Around the nose
- On blemishes or dark spots
Use a shade slightly lighter than your foundation for under-eyes and the same shade for blemishes.
Pro Tip: Let concealer sit for 30 seconds before blending. This gives better coverage.
Step 5: Setting Powder – Lock It In
Setting powder holds your foundation and concealer in place.
Types:
- Loose Powder: Lightweight, great for baking
- Pressed Powder: Travel-friendly, good for touch-ups
Focus on the T-zone (forehead, nose, chin) or areas that get oily.
USA Tip: In humid states, always set with powder to prevent creasing.
Step 6: Contour and Bronzer – Add Shape and Warmth
Contouring defines your bone structure, while bronzer adds a sun-kissed glow.
Contour:
- Use cool-toned brown shades
- Apply to hollows of cheeks, sides of the nose, jawline
Bronzer:
- Use warm-toned shades
- Apply to the forehead, cheeks, and jawline
Blend well for a natural look. Avoid harsh lines.
Pro Tip: Cream products are more natural-looking; powders are better for oily skin.
Step 7: Blush – A Pop of Color
Blush adds youthfulness and a healthy flush.
Application:
- Smile and apply to the apples of your cheeks
- Blend upwards toward your temples
Choose pinks or corals based on your skin tone:
- Fair skin: Soft pinks
- Medium skin: Peachy tones
- Deep skin: Berry and plum
LA Trend: Cream blushes for that “no-makeup” makeup look.
Step 8: Highlighter – Glow From Within
Highlighter brings attention to the high points of your face.
Where to apply:
- Tops of cheekbones
- Bridge and tip of the nose
- Cupid’s bow
- Brow bone
For a natural glow, use a champagne or gold-tone highlighter. Use a fan brush or fingers.
London Look: Subtle highlight for soft glam.
Step 9: Eyebrows – Frame Your Face
Your brows define your facial expressions.
Tools:
- Pencil: For precision
- Powder: For soft filling
- Gel: For hold and shape
Steps:
- Brush brows upward.
- Fill in sparse areas with light strokes.
- Set with clear or tinted gel.
Trend Alert: Fluffy, natural brows are in. Avoid over-drawing.
Step 10: Eyeshadow – Add Depth and Drama
Basic Eyeshadow Routine:
- Base Shade: All over the lid
- Transition Shade: In the crease
- Lid Shade: On the center of the lid
- Highlight Shade: On the brow bone and inner corner
Tips:
- Use matte shades for day looks
- Add shimmer for evening glam
- Blend thoroughly for a seamless look
Neutral tones are perfect for everyday wear in LA and New York.
Step 11: Eyeliner – Define the Eyes
Eyeliner can make eyes look bigger, sharper, or more dramatic.
Styles:
- Tightline: For a natural look
- Winged: For a bold statement
- Waterline: Adds intensity
Use pencil for soft looks and gel or liquid for precision.
Step 12: Mascara – Lift and Lengthen
A few coats of mascara can transform your look instantly.
Mascara Types:
- Lengthening: Makes lashes look longer
- Volumizing: Adds fullness
- Waterproof: Ideal for long wear or tears
Tip: Wiggle from root to tip. Apply 2–3 coats for best results.
Step 13: Lips – The Final Touch
Lip Routine:
- Lip balm for hydration
- Lip liner to define and shape
- Lipstick or gloss to finish
Choose your style:
- Nude for daily wear
- Red for glam
- Gloss for shine
London Favorites: Matte berry tones in winter
LA Favorites: Glossy peach tones in summer
Step 14: Setting Spray – Seal the Look
Setting spray locks in makeup and helps it last all day.
Types:
- Matte: Controls oil
- Dewy: Adds glow
Hold the bottle 8-10 inches away and spray in an “X” and “T” shape.
Event Tip: Always use a setting spray for weddings, events, or long days.
FAQs – Your Questions Answered
Q: What’s the correct makeup order?
A: Cleanser → Moisturizer → Primer → Foundation → Concealer → Powder → Contour → Blush → Highlight → Brows → Eyes → Lips → Setting Spray
Q: Can I skip some steps?
A: Absolutely! You can skip contour, blush, or eyeliner based on your preference or occasion.
Q: How long does a full-face makeup take?
A: With practice, 20–25 minutes.
Q: What makeup products should beginners invest in first?
A: A good foundation, concealer, mascara, blush, and lip product.
Final Thoughts
Mastering makeup is all about understanding the right steps and experimenting with what works best for your face and lifestyle. Whether you’re based in Los Angeles, London, or anywhere else in the USA, following this makeup routine step-by-step will help you build a flawless look—day or night.
Don’t stress about perfection. Makeup is an art and should be fun. Bookmark this guide, practice often, and soon you’ll be your own glam expert!


Leave a Reply